Measurement
of the hair system
Accurate measurements ensure a perfectly fitted, comfortable, and natural system.
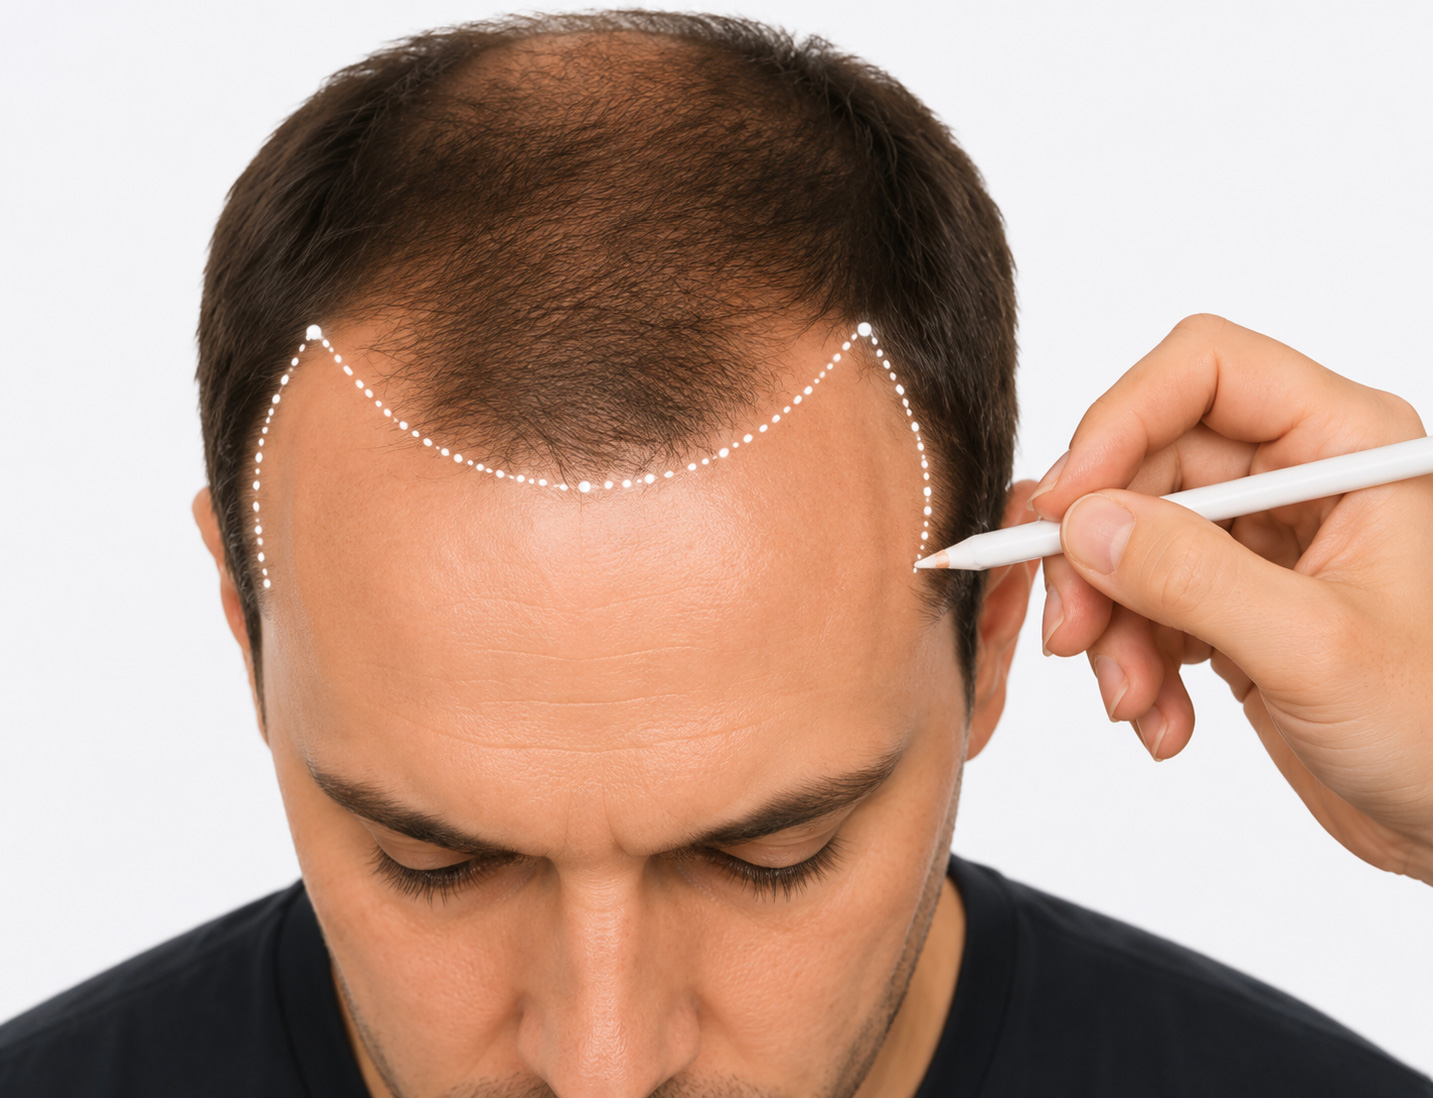
Define the natural area
Using a dermographic pencil (or an erasable marker), outline the area where the system will be placed.
Follow the desired hairline, the temples, and the back area. This step is crucial as it defines the exact perimeter of your system.
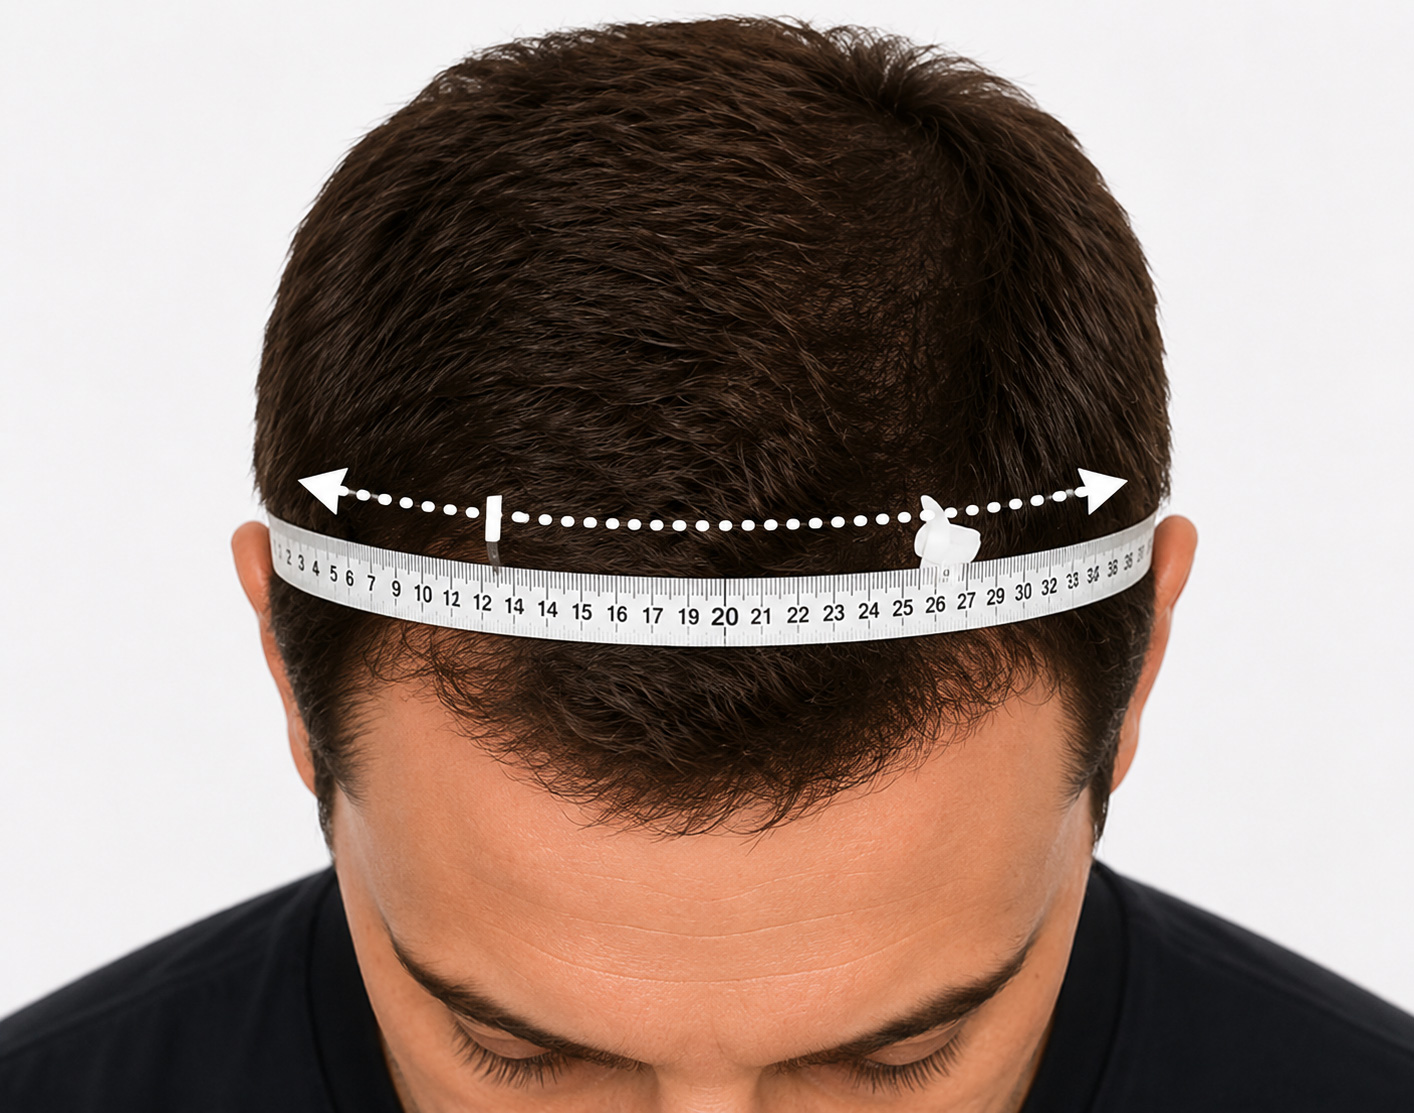
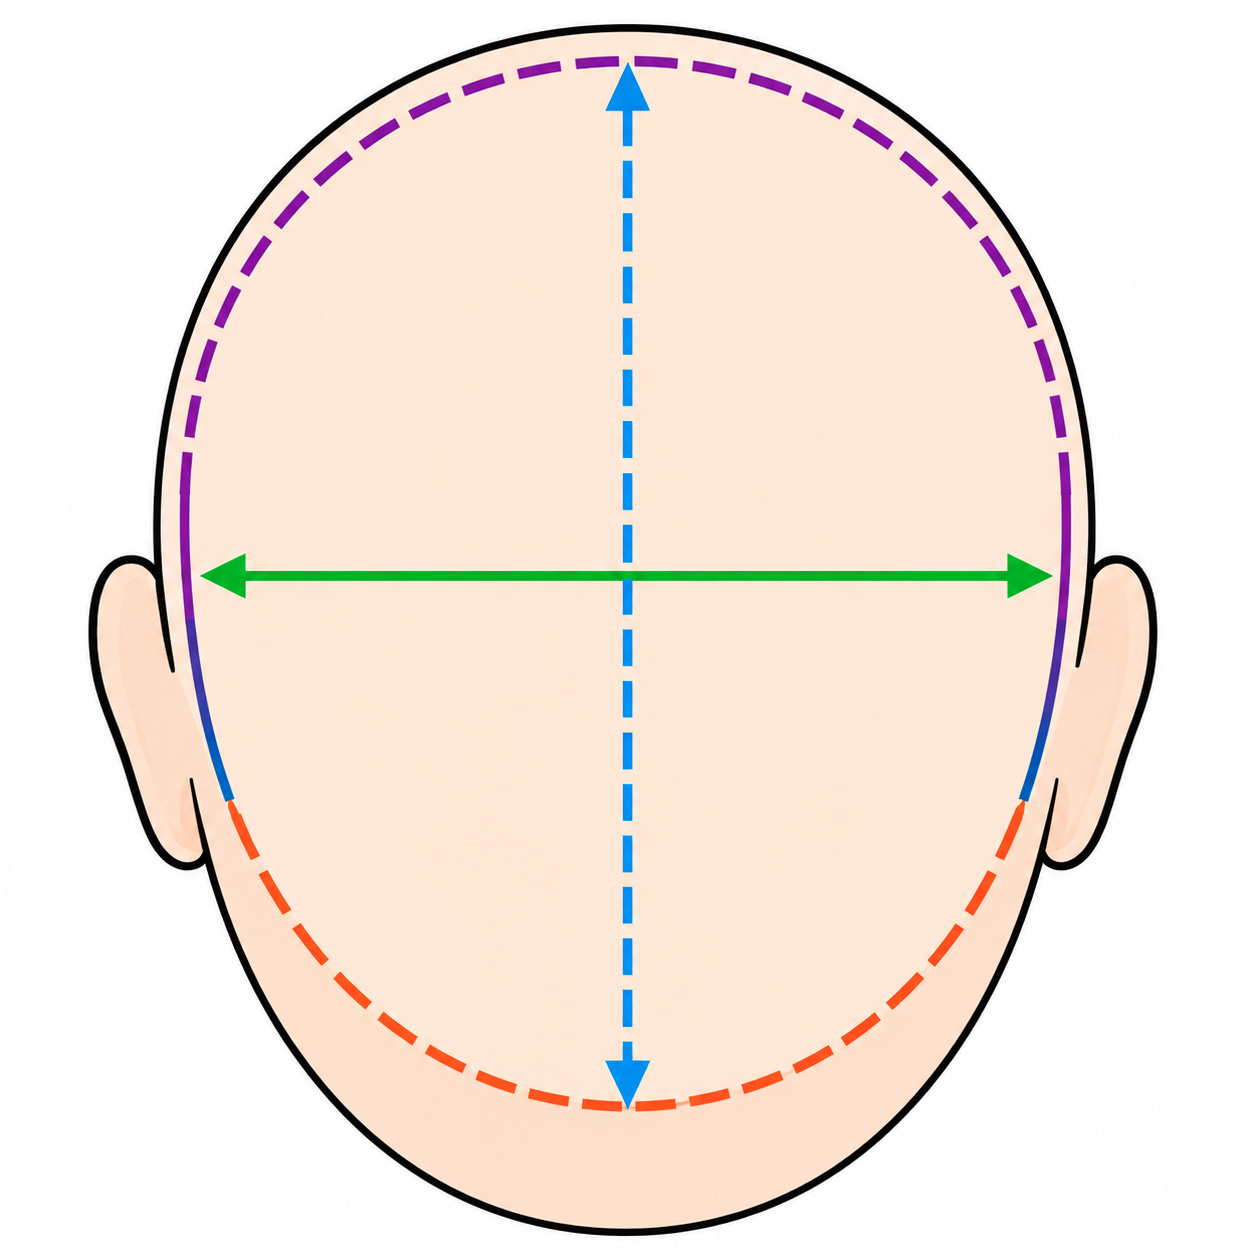
Measure the width of the area
Measure the maximum width of the area to be covered, from one temple to the other.
Go through the widest point at the back if the area requires it. The measuring tape should follow the shape of the skull without being tight.
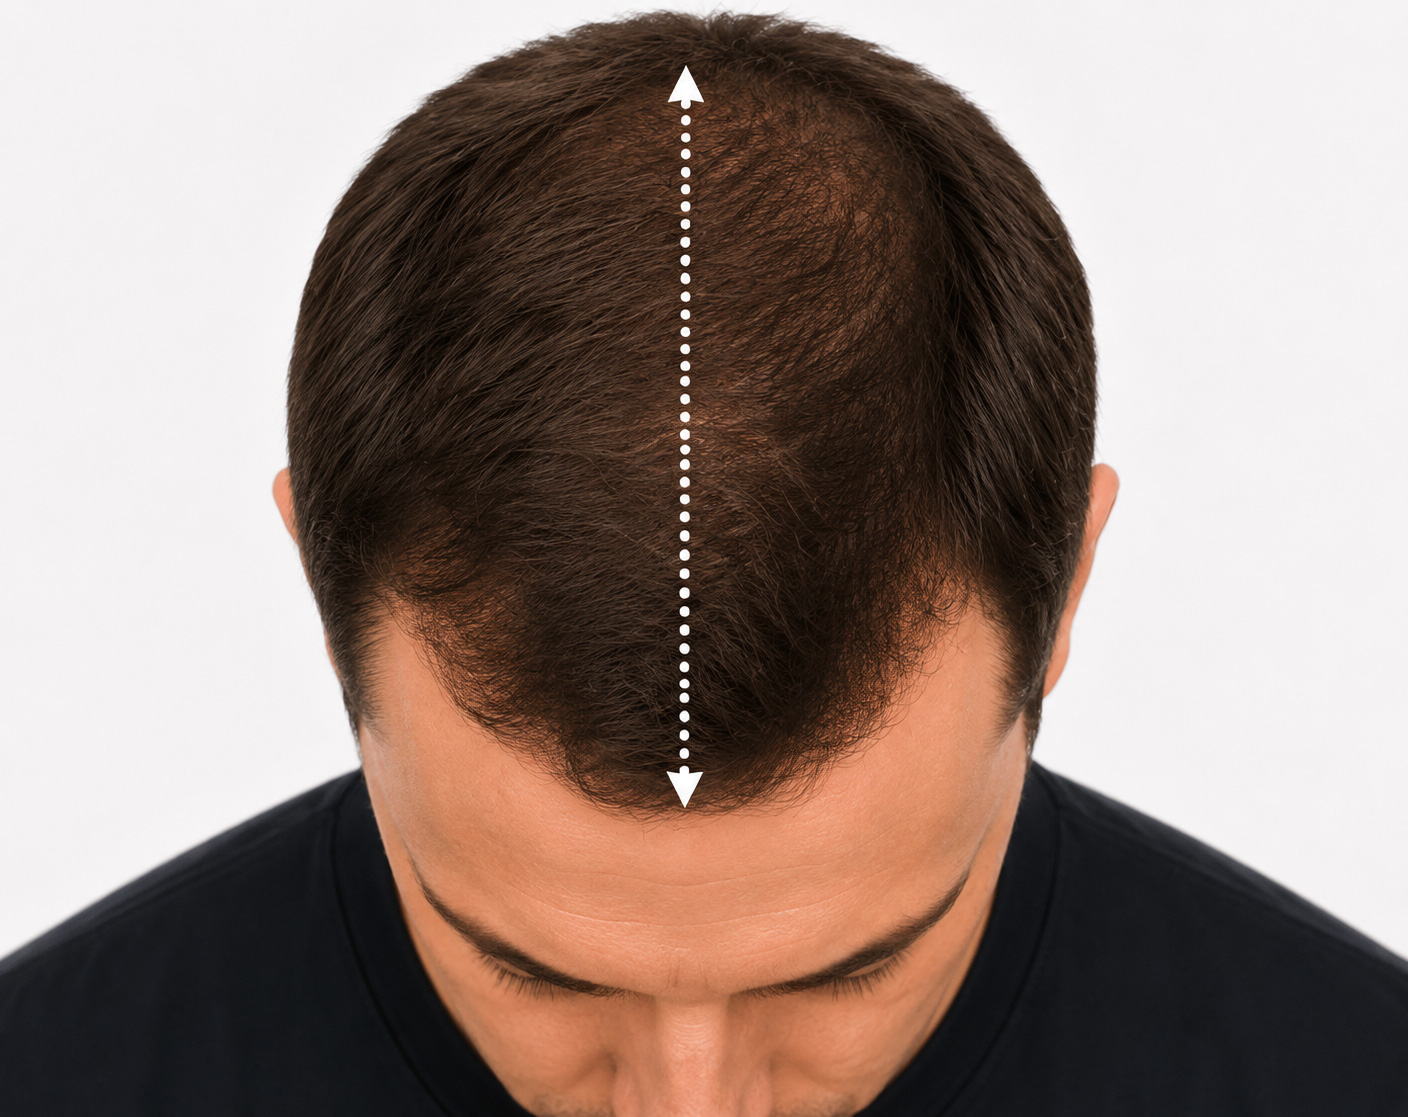
Measure the length
Measure the length of the area to be covered, from the furthest point of the hairline to the furthest point at the back.
Place the tape at the center of the skull and follow the natural curvature without pressing.
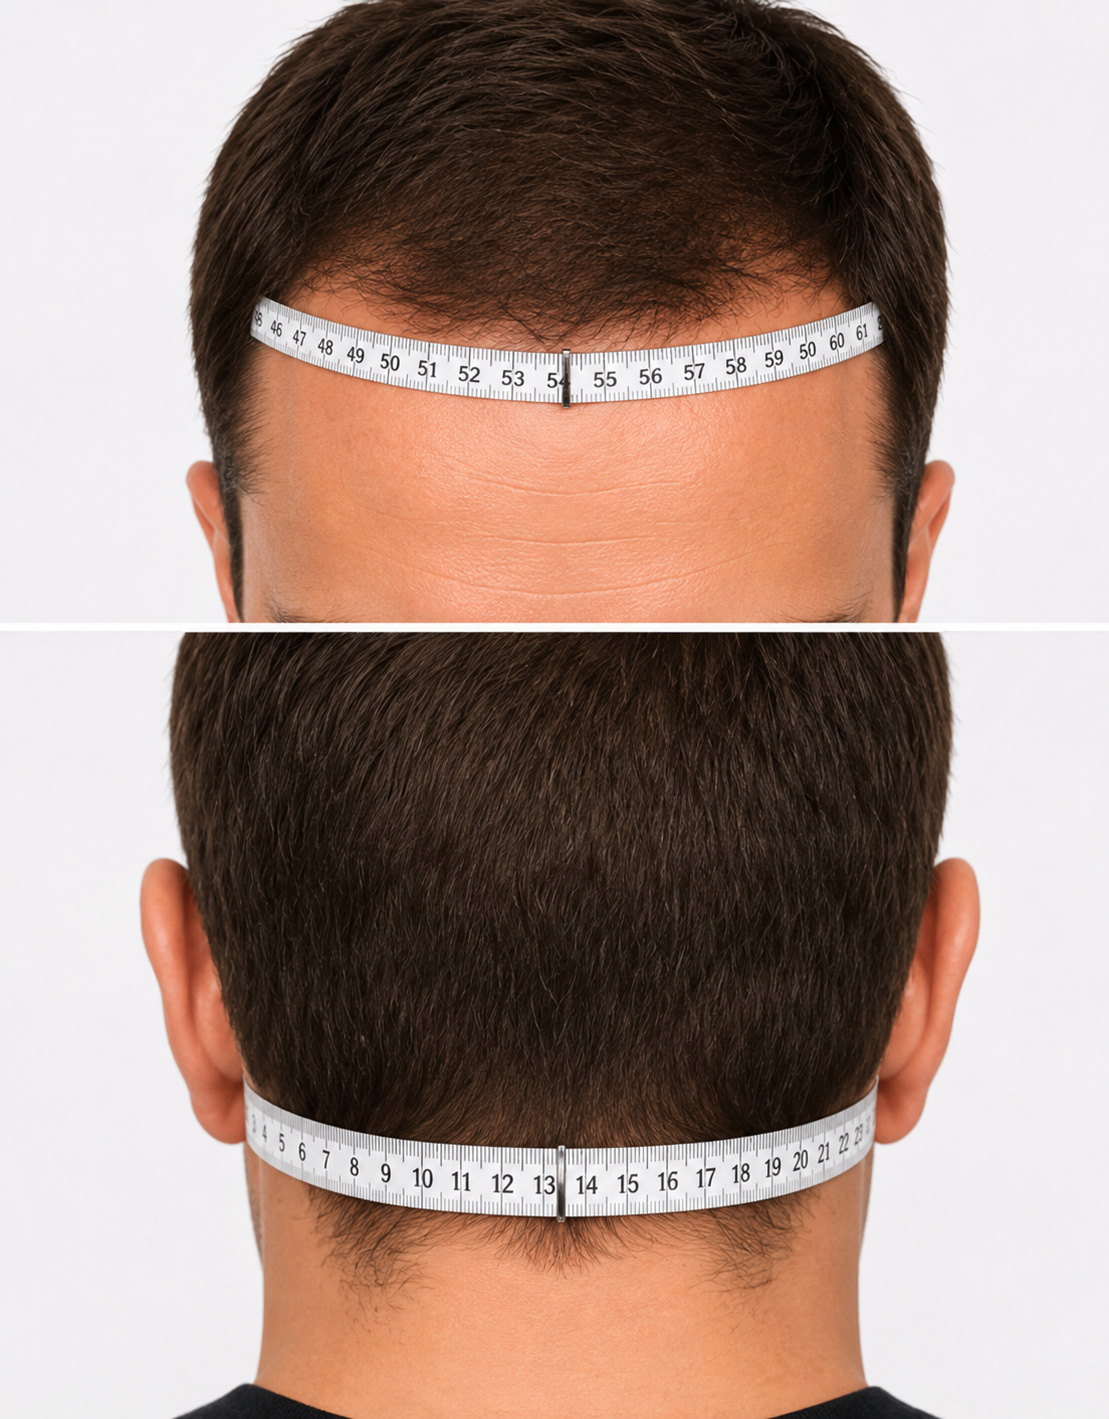
Measure the curves
For more accuracy, measure the curve of the hairline, then that of the back area.
Follow the line drawn with the tape without pulling it tight. These measurements allow for an accurate reproduction of the shape of your skull on the system.
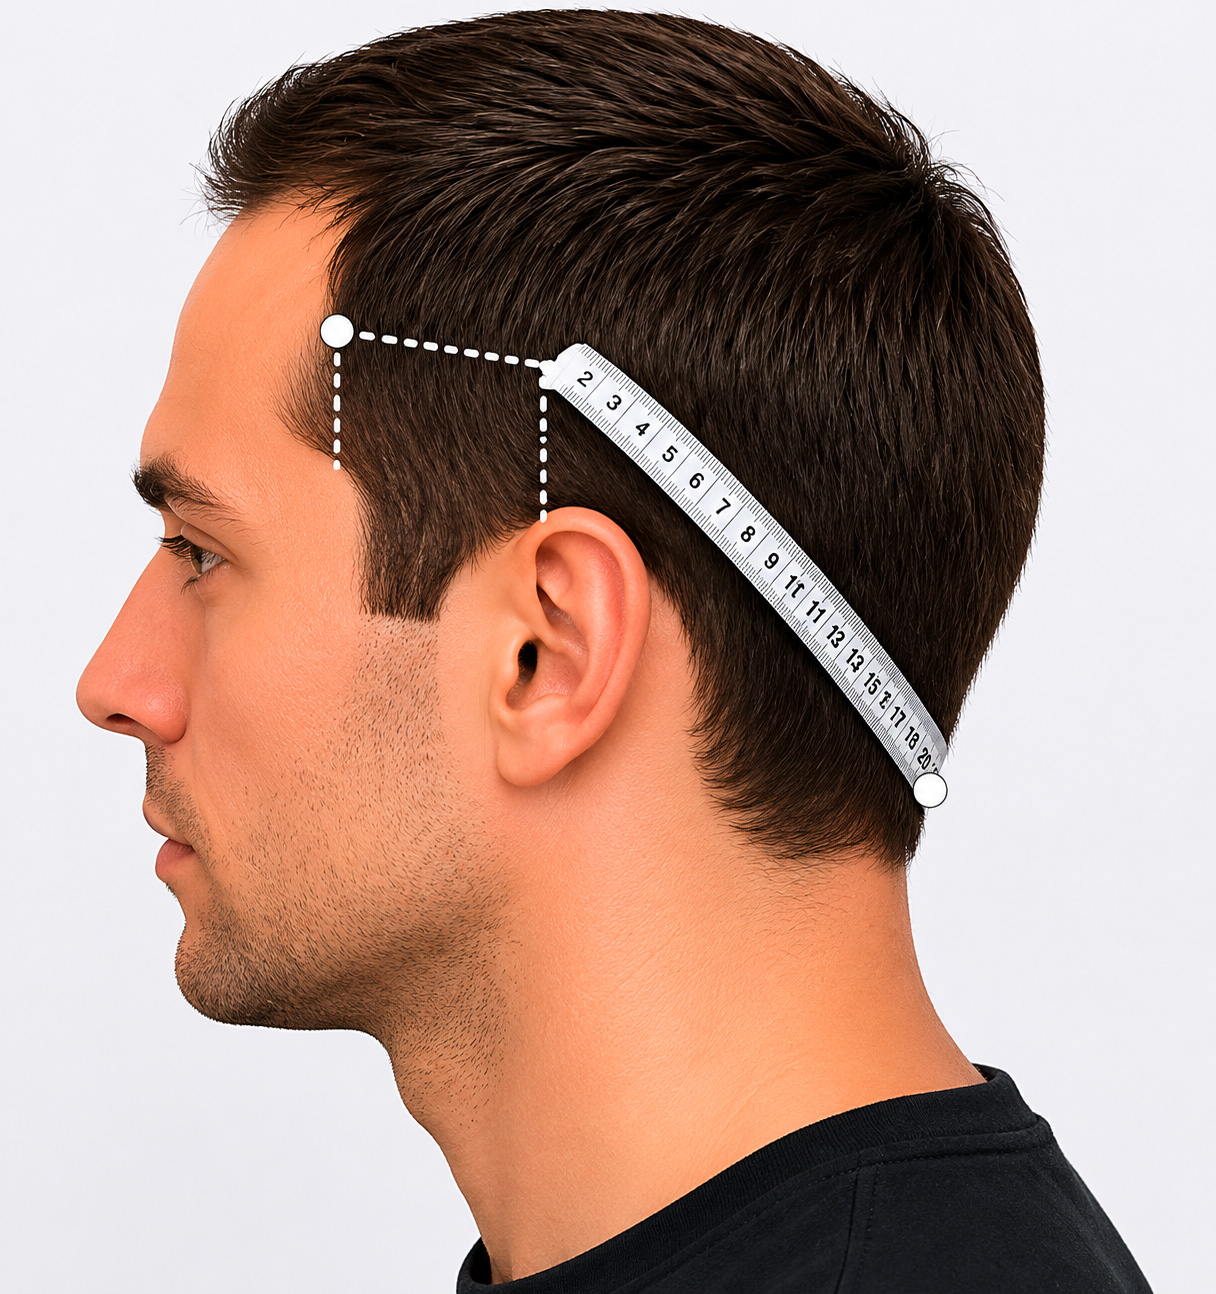
Measure the temples
If necessary, measure the distance from each temple — from the starting point of the hair to the back line.
This measurement is particularly important if the hair loss area is asymmetrical.
Check and note
Check all measurements a second time. Take reference photos (front, top, sides, and back) with the drawn lines visible.
Also note the desired density, the direction of placement, and any particularities (cowlicks, scars, asymmetry).

Summary
of measurements
- Width (temple to temple) ________ cm
- Length (front to back) ________ cm
- Frontal curve ________ cm
- Back curve ________ cm
- Left temple ________ cm
- Right temple ________ cm
Take photos
Take photos from the front, top, sides, and back with the marked lines visible. Accurate measurements are the key to an undetectable result.
See our complements